Windows dependencies (WSL)
Don't follow this step if you plan to run BlurIt OP on Linux. Go there instead.
Prerequisites Before Installation
Before starting the installation, ensure you have received the archive containing all necessary documents. This archive will be shared via a secured link protected by a password.
Contents of the Archive
Main Archive: client_name_YYYYMMDD.tar.gz
The archive will include the following files:
License File:
license_client_name_YYYYMMDD_YYYYMMDDThe license file specifies the validity period (start and end dates).
Registry Login:
login_registry.txtContains the credentials to access the registry.
Custom Configuration File (if applicable):
blurit_stack.yml
Nvidia Driver installation
Download the NVIDIA driver >= 470 exe from: https://www.nvidia.com/Download/index.aspx?lang=en-us
You can also update the drivers using Nvidia Geforce Experience.
Install WSL 2 (Windows Subsystem Linux)
To Check if WSL is installed, open PowerShell as administrator and run:
If WSL is not installed:
Then reboot your machine.
It is possible to modify the resources allocated to WSL. For more information, you can refer to this link: https://learn.microsoft.com/fr-fr/windows/wsl/wsl-config#wslconfig.
Docker installation
Instruction to install docker CE on windows with WSL 2 backend : https://docs.docker.com/desktop/install/windows-install/.
During the install don't forget to tick the Use WSL 2 instead of Hyper-V checkbox.
Additionally, if you want the BlurIt app to restart automatically when the machine restarts, check the box labeled 'Start Docker Desktop when you sign, in.'
Nvidia-docker installation
To enter WSL, open PowerShell and type wsl followed by pressing Enter.
Verify that Nvidia-Docker is installed:
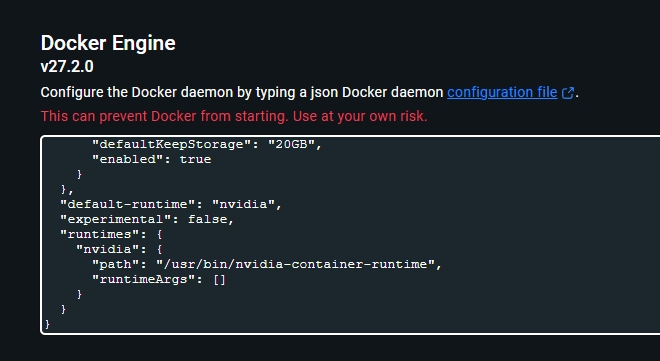
Configuring Docker daemon
Append the following JSON content on the Docker Desktop config like this:

Restart Docker for the change to take effect.
Post-install docker linux on WSL (required):
Blurit CLI Installation
The Blurit CLI enables you to easily configure, start, and interact with Blurit. It provides a command-line interface to manage features and streamline platform usage.
Start these commands from WSL: